Sharing Virtual Tables & Model-Driven Apps
While one might assume that sharing Virtual tables has the exact same approach as sharing regular Dataverse tables with users, that is not entirely correct. Also in this context there’s a tiny difference, which is not nescesarily obvious.
First thing we need to do, is navigate to the Admin center of Power Platform, and find the respective environment. This can be done before pushing from dev -> test -> prod, but then you need to include the security role in your solution.
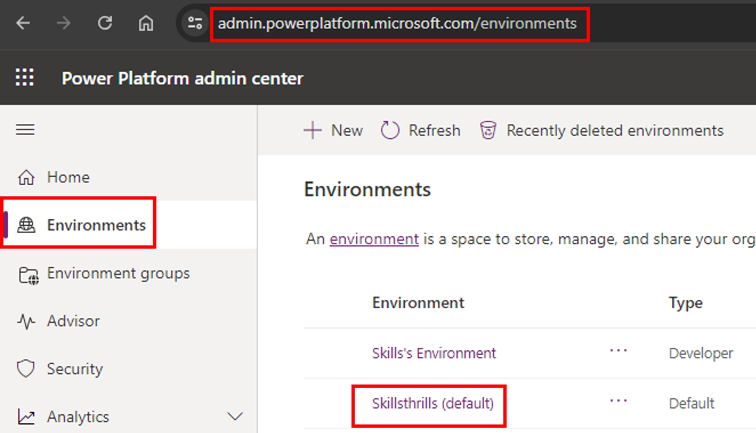
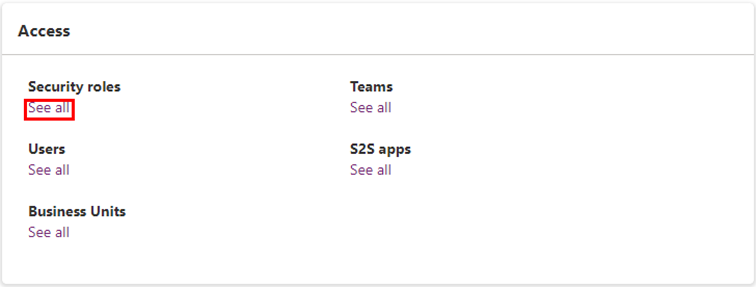
Once we have identified the environment, we need to get into the Security Roles, as this is where we’re gonna be altering access rights.
Editing security roles
In this example, we simply edit the Environment Maker role, but I would highly recommend creating a copy of the role with the least privileges for your case in particular, that could very well be either AppOpener or BasicUser.
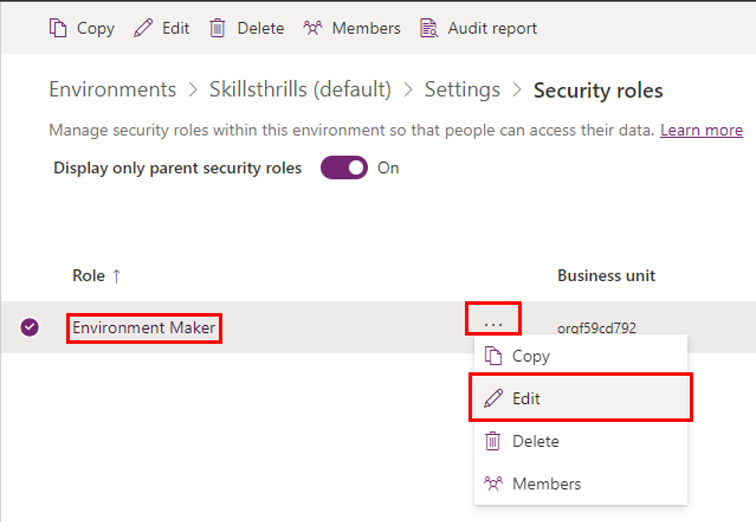
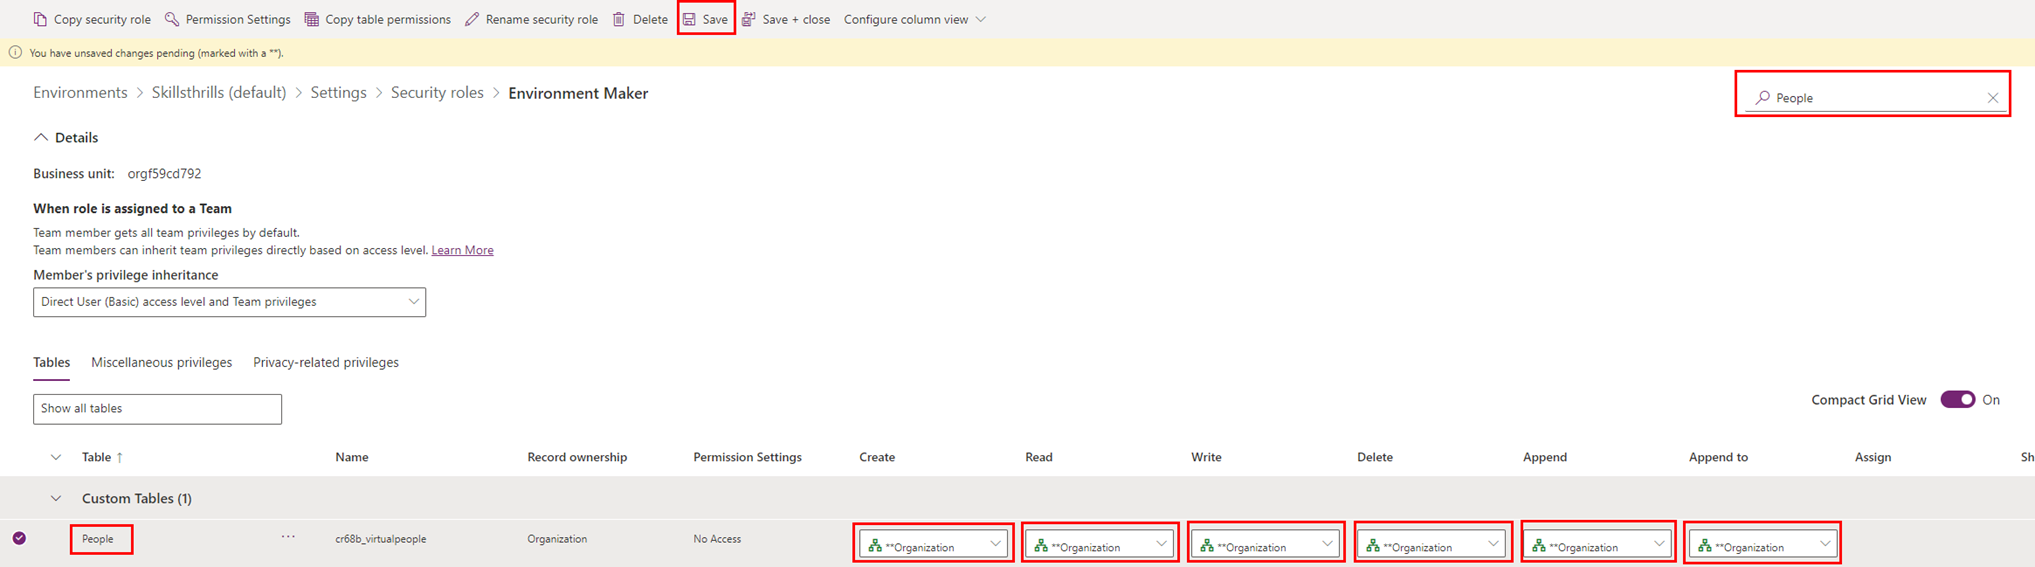
Once we’re in the editing interface, of the actual security role, we need to change the drop-down to show us all tables, rather than the already assinged tables (else it will be hard to create new access).
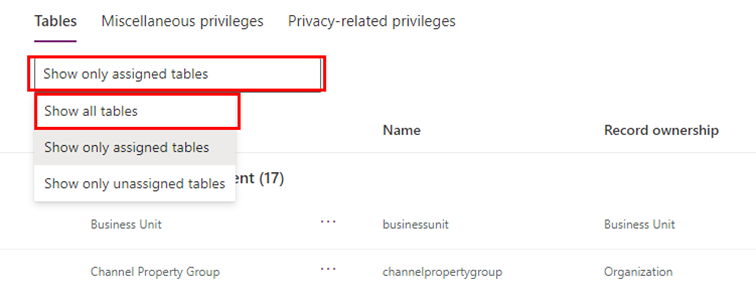
First of all, use the search bar at the top right, here we will input “People” as that is the name of our table. Here we will add all the possible use rights there are, as shown below. Remember to hit Save, or Save + close.
Remember to assign the role to the user too, else you will not get too far from here. Or even better, add the user to a team and the role to the team – that will reduce your management overhead.
Sharing the application
Heading back to the main page of Power Apps, identify your application and navigate to the sharing menu.

Here, we will at first have to assign the possible security roles to the application itself, it defaults to System Administrator and System Customizer, where I will add Environment Maker, and you will add the copy of the role with the least privileges 😉.
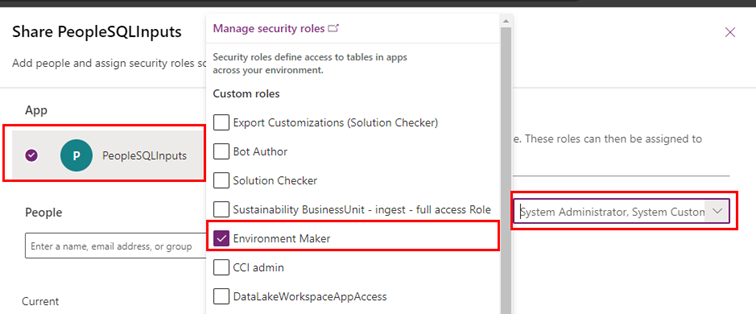
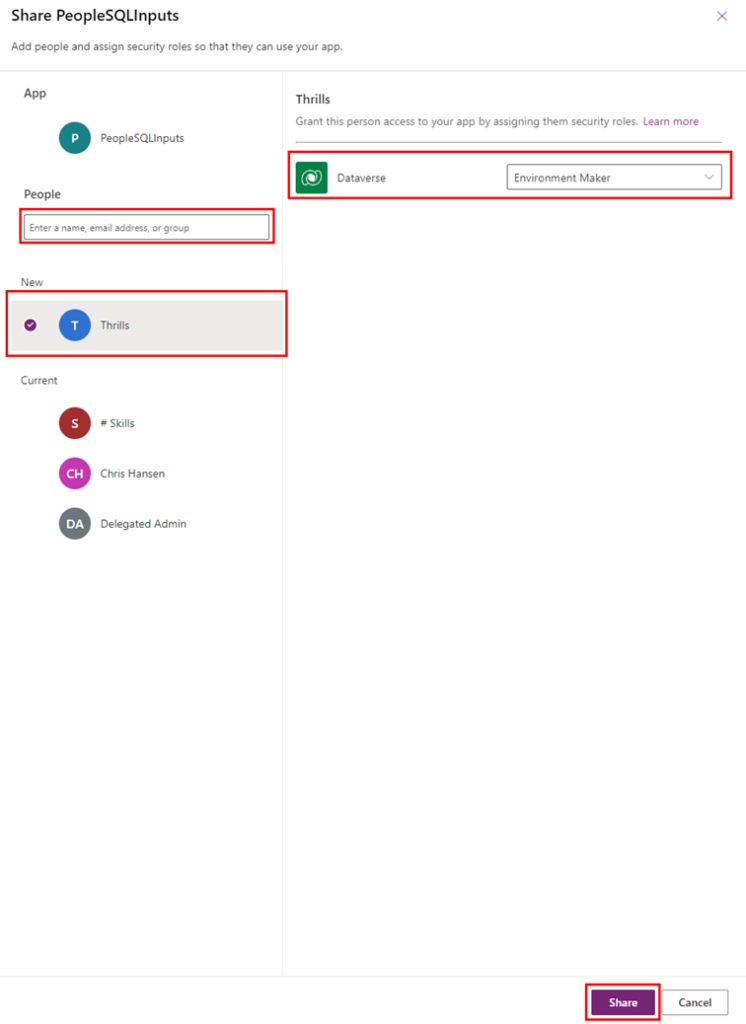
Add the user or team in question by searching in the search bar, and select your user and the respective security role in the drop-down as well.
Now the other user is able to open the application, and even though it has full rights to the virtual table, there will be no data present in the application, and on top of that, there will be no signs of an error message either. It will simply be empty.

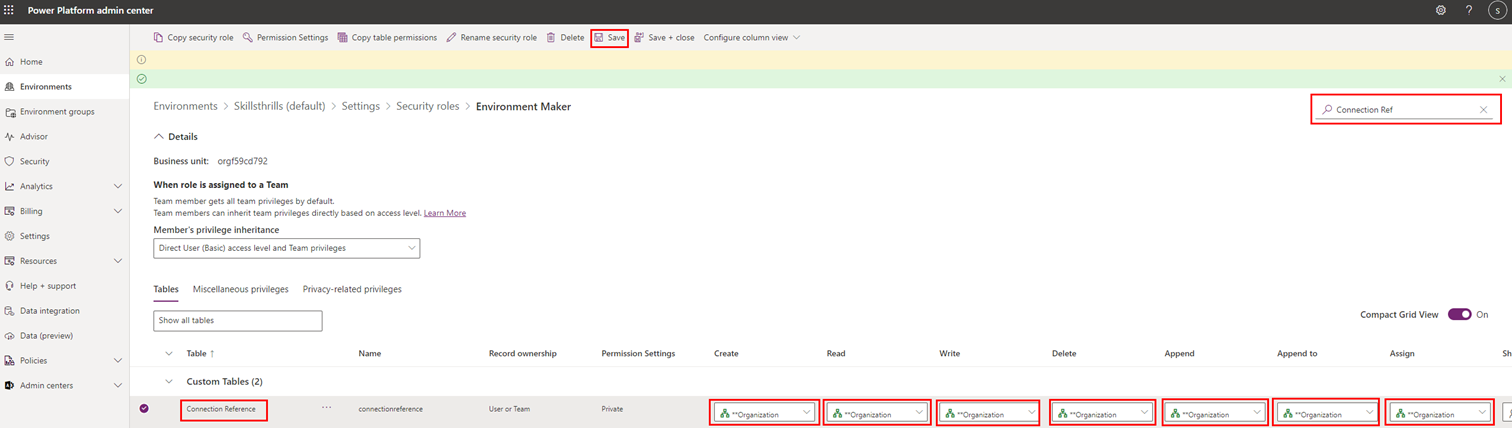
Adding additional rights
The fix is to change the rights to the Connection Reference table on top of this. The default value for Environment Maker is “User” in all columns, and while there may be an approach with fewer privileges, changing all columns to Organisation will once more do the job. Remember to hit either Save or Save + close.
Navigating back to the application with the other user, we will now be able to refresh and see the full dataset.

Closing thoughts
This solution in particular has been a bit of a head scratcher for me. Originally, one had to change the view to the legacy view to even access these settings, but between finding out and writing up this post, Microsoft has since changed that, which is pretty awesome.
Also, please do consider replacing giving users access with giving access to Teams instead, it’s so much easier and as your organisations’ use of Power Platform grows, you will want to reduce time spent on managing access as much as possible, and what is actually easier than Entra Security Groups, which are most likely managed by another department anyway.