
Want to build your first Power App?
The first decision that needs to be made, is which type of data storage to use. In this example we’ll be using a Sharepoint Online list, since that allows us to get started rapidly. We could also create a Dataverse setup using Copilot, or doing pretty much the same exercise using Azure SQL. But, setting up a Sharepoint list is fairly straight forward, and allows us to stay on free licensing – Yay!
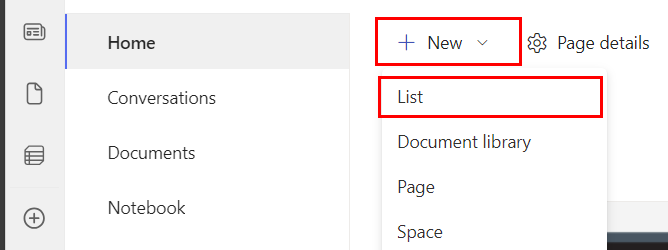
Navigate to the Sharepoint site, where you want to store your list, and select “New” followed by “List”.
In this case, we’ll opt for a blank list, but you can also generate on based on an Excel or a .CSV file, if you want to.
We’ll have to give the list a name, and in this case I’ll opt for “PowerappsWriteback”, and then I’ll uncheck the checkbox saying “Show in site navigation”. This reduces the chances that potential users will stumble upon the list, and potentially deleting content or doing other things they shouldn’t be doing

Defining the structure
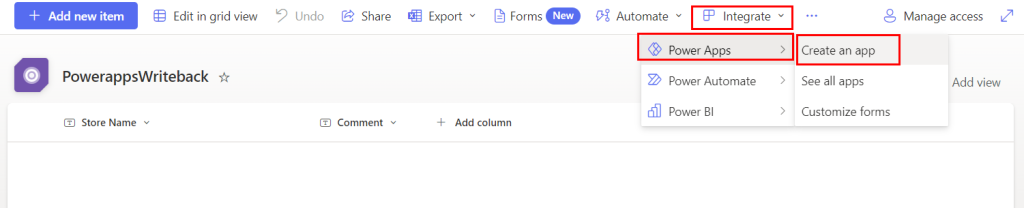
If you went with a blank list, and want to follow this tutorial all the way, it’s now time to rename the first column of our list “Title” to Store Name, and add a new column, and call it “Comment”. The type of the new column should be “Text”. You can also opt for Multiples lines of text if you so wish.
Once you have those two columns set up, select “Integrate” towards the top right, followed by “Power Apps” and “Create an app”. This will create a standard templated application for you.
Be aware that this application is built in your default environment, which is generally a bad idea. However, assuming this is your first or one of your first applications, let’s not focus on that part for now, let’s just focus on the application at hand.
Creation, deletion and editing of records
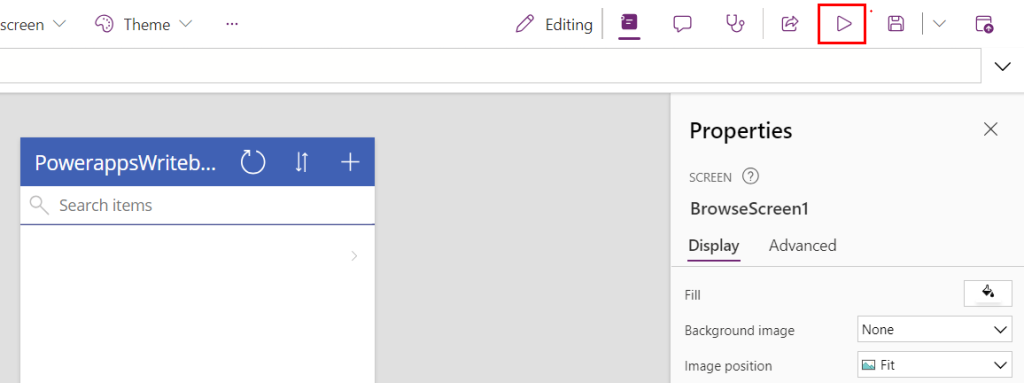
You’ll arrive in the Power Apps Studio, with all of the editing functionalities. What we’ll focus on is the ability to press “Play” and test drive the application, at the top right corner.
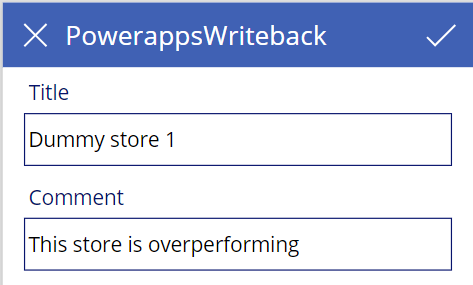
Once in play mode, press the “+” in the top right corner of the application itself, to start the creation of a new item in the Sharepoint list. Here we’ll see that it’s still referred to as Title, even though we changed the name to Store Name. Maybe, in your case, the name will actually have changed. Anyway, let’s fill in a dummy store name, and a potential comment for said store. We’ll leave attachments blank.
Press the check mark, and navigate to your Sharepoint list and you should see your newly created record. If it is not there, simply refresh your browser tab, and it should appear.
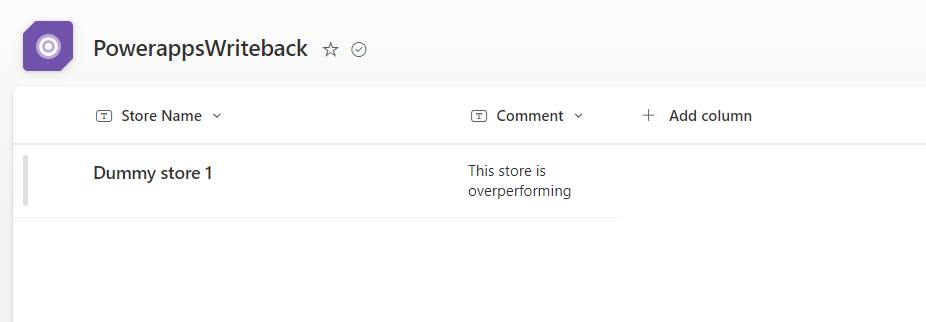
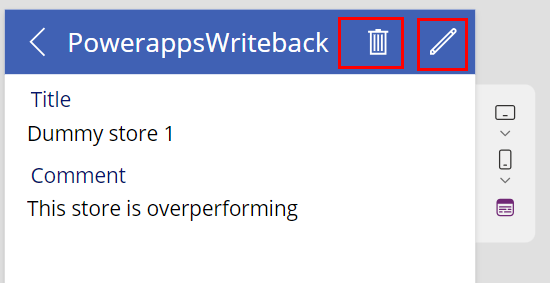
While the scenario covered now was simply the creation of a new item. We’re also able to both edit and delete items in the list. First of all, the application now shows an item, and if we add more here, the search functionality will also start to make more sense.
Pressing on an item, and thereby selecting it, in the Power App, will navigate us to a separate screen, from which we can both edit and delete the item.
Sharing the application
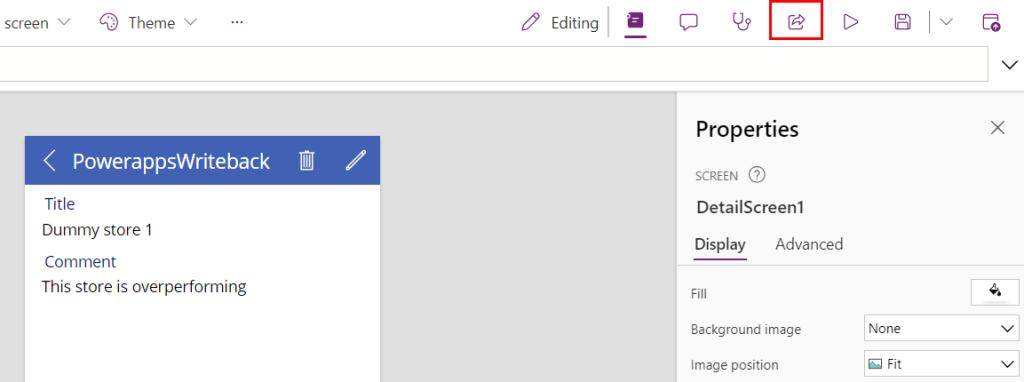
Finally, exit play mode of the application, and press the share button just next to it. You’ll be prompted to save the application, and give it a name, if you haven’t already done so. If prompted for those things, after filling it in, you’ll press “Back” in the top left corner, and press the share button again.
This will allow you to share the application with users in your organisation, allowing your colleagues to contribute just as well as yourself. Just be aware, that only the permissions that they have on your Sharepoint list, will be reflected in the application. That means, if the users that you share the application with, do not have access to the Sharepoint list you created, they will see nothing and be able to do nothing. Basically, the sharing is on you.
Notice here that you can send an e-mail invitation to the users, and also allow them to be co-owners of your application, and thereby having them not only contribute to your list, but also to your actual application.
Closing thoughts
While this may not be groundbreaking in the sense of functionality inside the application, I still fondly remember the first time I did this myself. To this day I still demo this scenario often, since it allows us to go from nothing to a functional application in a very short period of time. There are a lot of things to learn from here, such as why you might want to steer clear of Sharepoint Online as your data source, or why you should definetly steer clear of the default environment as a whole. For now we’ll celebrate the awesome victory of creating your potential first application with Power Apps!