
Virtual Tables – an introdoctury how-to
Why even mention Virtual Tables? Well, in the world I live in many organizations have their data in SQL databases in one way or another, and at the same time many organizations have heard how easy it is to get started with Model-driven applications. But to work with those, data needs to be available in Dataverse. While it is indeed possible to stage our data from SQL and into Dataverse, this can be both tiresome and costly. Which is why Virtual Tables are relevant – a virtual representation of the data we have stored in SQL already, but this time in Dataverse, Supporting full CRUD (Create, Read, Update, Delete). Virtual Tables are also relevant if you have data stored in a Sharepoint list.. for some reason, or if you have a Dynamics 365 Finance & Operations setup, which can also use this virtual representation.
To kick off this post, we’ll start with creating the things nescessary on a Azure SQL server including a schema, login, user, permissions and the table itself. After that we’ll create the virtual table in Dataverse, as well as setup a solution & connection reference.
Creating the Schema
Generally, schemas allow us some sort of order in the mess that can be a SQL Database, including a way of managing permissions. You could easily build this on the standard dbo schema, but best practices would imply not placing everything in that same schema.
CREATE SCHEMA virtualCreating the Login as well as user
Part of creating a user, also includes creating a login. The login is created on the “master” database, while you would create the user on the database that you’re interested in using. We could change the database using a “Use” statement, however Azure SQL doesn’t support this, so it’s two seperate statements.
CREATE LOGIN  [virtualskills]
WITH PASSWORD = 'GenerateAPasswordHere’;

CREATE USER [virtualskills]
FOR LOGIN [virtualskills]

-- ALTER ROLE db_datareader ADD MEMBER [virtualskills];
-- ALTER ROLE db_datawriter ADD MEMBER [virtualskills];
Granting permissions
We can control permissions on both the User level but also a Role level. In the below, we’re granting permissions on the user level, for the schema “virtual”.
We can roughly translate Create, Read, Update & Delete (CRUD) to Insert, Select, Update & Delete in SQL Terms.
The Execute permission is commented out, however one of my personal favorite permissions, giving the ability to execute stored procedures on said schema.
GRANT SELECT, UPDATE, INSERT, DELETE /*,Execute*/ ON SCHEMA::virtual TO [virtualskills]Creating the table
Generally in Power Apps, we need a primary key on a SQL table, before we’re able to actually insert rows into said table. Therefore I always include a primary key column, in this case an Identity(1,1) which means it starts at 1, and increments the value by 1 every time a new row is added. Alternatives could also be using UNIQUEIDENTIFIER if I am more interested in GUIDs rather than integer values.
CREATE TABLE [virtual].[People](
	[PeopleId] [INT] IDENTITY(1,1) NOT NULL,
	[GivenName] [VARCHAR](30) NULL,
	[SurName] [VARCHAR](50) NULL,
	[JobTitle] [VARCHAR](50) NULL,
PRIMARY KEY CLUSTERED
(
	[PeopleId]
)
)
Creating a solution and a Connection Reference
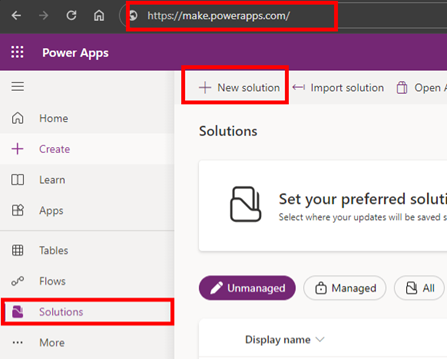
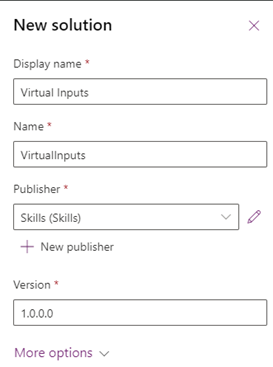
A big part of Power Platform as a whole is solutions & environments, as these allow for a proper Application Lifecycle Management (ALM) approach, as well as security aspects. To start out a Solution is created, and I have created a Publisher as well, to be able to tell the difference between the organizational owners of various solutions. Working with the default publisher is definetly possible, and creating your own publisher is not needed for most use cases.
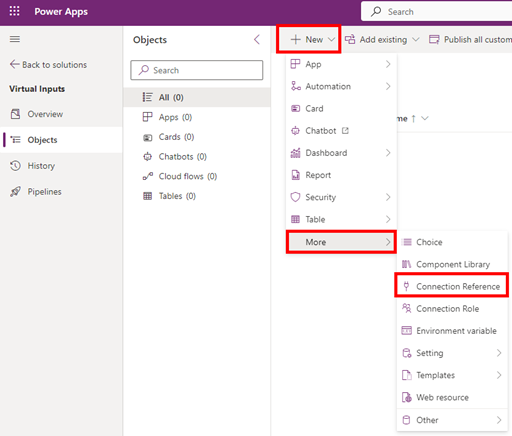
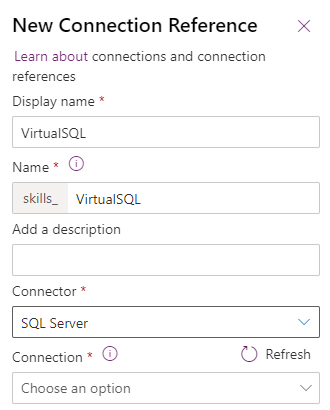
Another vital part is Connection References, this allows us to create a reference to a connection, and point to said reference, instead of pointing directly to a connection. Which means I am easily able to change between development, test and production environments for instance, and I can use the same reference across multiple solutions. It reduces a lot of clutter in the connections tab of the Power Platform, and easens the ALM proces. In this case we’re also using the SQL Server Authentication, which means we will be creating an implicitly shared connection, and thereby if we share an application using this connection, we will also be sharing the connection with the user. There are some potential security concerns about this, but luckily also ways to mitigate those.
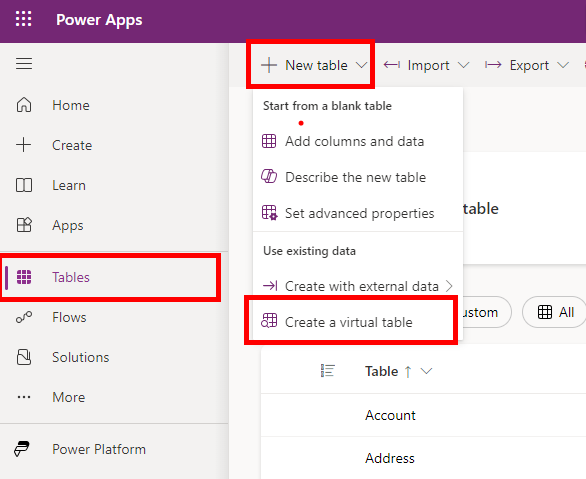
Creating the Virtual Table
Now with all the household tasks done, it’s finally time to create the virtual table itself, which luckily is a smooth proces.
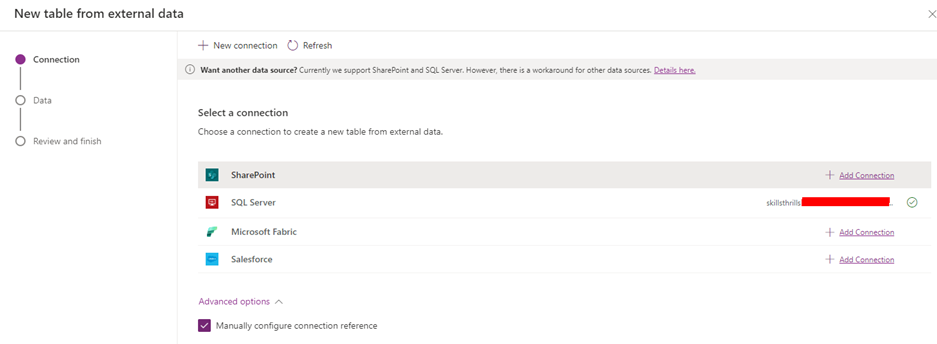
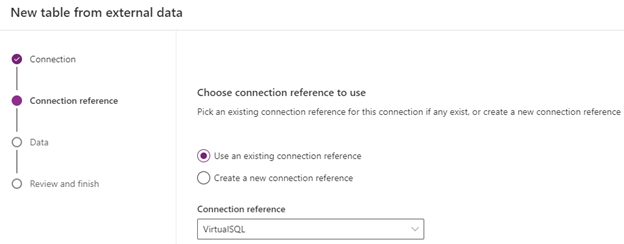
We’re pointing to SQL Server, and as we already created the connection reference, make sure to check the checkbox allowing us to “manually configure connection reference”, and then simply select the connection reference from the dropdown. A note here, is that this can be done on on-premises SQL just as well as it can be done on Azure SQL, with the major difference being performance, as the path to on-premises usually is longer.
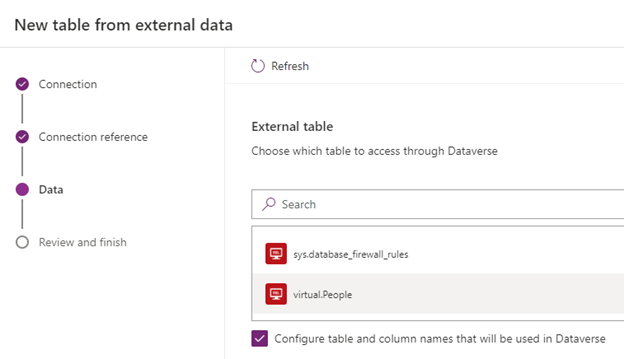
After having selected the Connection reference, it’s time to select and configure the table we are interested in. In this case I see my schema, virtual and my table, People, and therefore opting for that.
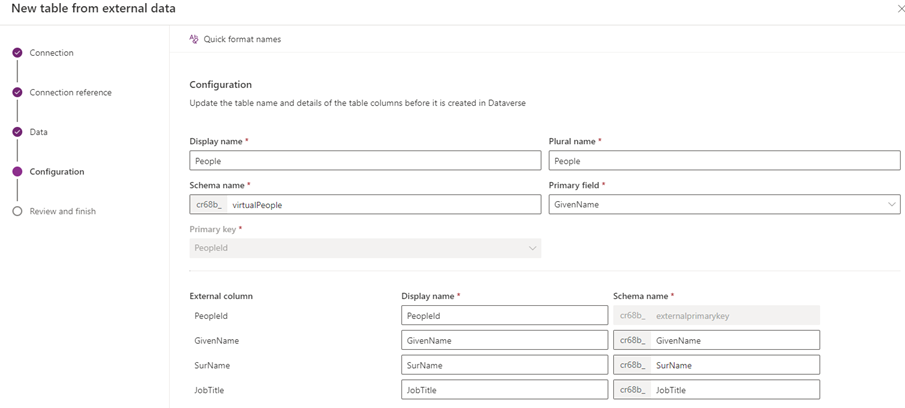
Now we’re able to start creating the names of our columns in Dataverse, as well as the Display name of our table, and all the usual things that are part of creating Dataverse Tables. Be wary of the Primary field you select, this can not be changed without deleting and re-creating the virtual table.
As I have done the naming on the SQL side of things, I am generally happy with the naming. Often the Quick format names at the top left can get you started in simplifying naming, but it will not help you renaming things. Have fun mapping!
With the mapping exercise done, if everything has gone to plan, we should now be able to see a new table in Dataverse. An important thing to note is that the Type is set to Virtual.
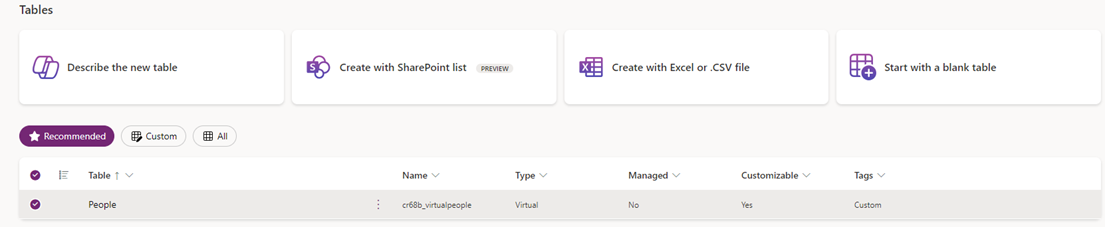
While there already are virtual tables in Dataverse, such as the Entra ID table, we have just gone through the process of easily adding our own virtual tables, and the majority of the things we did, were not really part of setting up the virtual tables, but all the prerequisites for doing this, which is often already existing.
Closing comment
Whle many things can be written about the limitations of the tables, I will not be going into details about those. They can be found here, where they are also kept up-to-date!
And just to repeat it, the purpose of this whole thing is to make SQL data as well as Sharepoint data available in Dataverse, which generally would be for use cases including Model Driven Applications. If you’re working with Canvas applications, consider a direct connection to SQL instead.
The natural next steps from here would include:
- Editing data in SQL using Dataverse virtual tables and Excel
- Creating a Model-Driven application on top of a Virtual Dataverse table
- Sharing access to Virtual tables
- Application Lifecycle Management of Virtual Tables